How to Put Blade on Angle Grinder: A Step-by-Step Guide for Beginners

Have you recently bought an angle grinder and want to get started on your DIY projects? Installing a blade on an angle grinder may seem daunting, but it’s a simple task that doesn’t require a lot of technical knowledge or skill. Think of it as putting together a puzzle – you just need to fit the pieces in the right order. With a few basic tools and some easy-to-follow steps, you’ll have your angle grinder ready to use in no time.
In this blog post, we’ll walk you through the process of installing a blade on an angle grinder. From choosing the right blade to tightening the nut, we’ll cover everything you need to know to get the job done safely and efficiently. So grab your tools and let’s get started!
Introduction
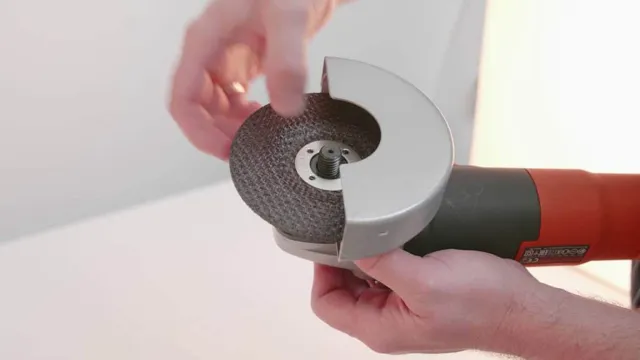
If you’re looking to learn how to put a blade on an angle grinder, you’ve come to the right place! Luckily, it’s a pretty straightforward process. First, make sure the grinder is unplugged and the blade you’re going to install is the right size and type for the tool. Next, remove the disc from the grinder by pressing the lock button and unscrewing the spindle nut.
Then, place the new blade on the spindle and tighten the nut, making sure it’s secure. It’s important to make sure the blade is facing the right direction according to the tool’s rotation direction indicated by an arrow on the blade. Once secured, plug the grinder back in and test the blade on a scrap piece of material before starting your project.
Remember to wear proper safety gear, like gloves and eye and ear protection, when using your angle grinder. With these steps, you’ll be ready to start using your grinder with a brand new blade!
– Explanation of an angle grinder
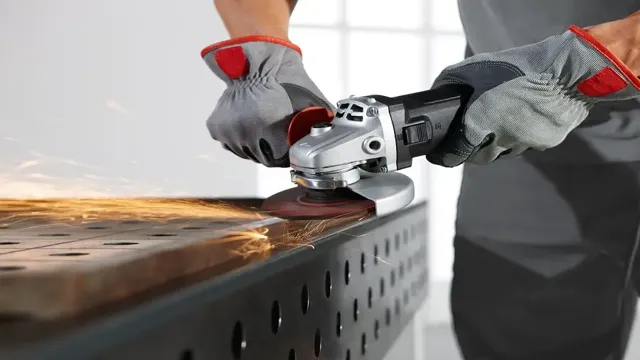
An angle grinder is a versatile power tool that is commonly used in construction, woodworking, and metalworking. It features a rotating disc or blade that can be used to grind, cut, sand, or polish a wide range of materials. The disc or blade can be made of different materials such as steel, diamond, or abrasive materials.
The tool is powered by an electric motor that can operate at high speeds, allowing the user to work quickly and efficiently. The angle grinder can be adjusted to various angles, making it easy to work in tight spaces or hard-to-reach areas. It is an essential tool for any DIY enthusiast or professional tradesperson looking to get the job done quickly and accurately.
Its power and versatility make it a must-have in any toolkit.

– Importance of proper blade installation
Proper blade installation is crucial for ensuring the safety and effectiveness of your equipment. It’s essential to understand the importance of ensuring your blade is installed properly before using it. If the blade is incorrectly attached, it could lead to serious accidents, injuries, and even death.
To avoid this, always read the instruction manual and follow the manufacturer’s guidelines before installing the blade. Additionally, it’s essential to ensure that all the screws, washers, and other components are secure and tightened to the correct level. Neglecting this crucial aspect of blade installation could cause significant damage, not only to your equipment but also to the surrounding area.
In conclusion, proper blade installation is a fundamental aspect that should never be neglected. A little attention to detail and following manufacturer guidelines could save lives and equipment, making your work more efficient, safer, and productive in the long-term.
Step-by-step Guide to Installing a Blade on an Angle Grinder
If you’ve recently purchased an angle grinder, you may need to install a blade before you can begin using it. Fortunately, the process of putting a blade on an angle grinder is relatively simple. First, ensure that the grinder is unplugged and that the blade you’re using is appropriate for the grinder.
Then, remove the outer nut from the grinder and set it aside. Slide the blade onto the shaft and align it with the flange. Reattach the outer nut and tighten it securely using a wrench.
Be sure to follow the manufacturer’s instructions for proper installation and safety precautions. With your new blade installed, you can tackle a wide range of DIY projects with ease. Remember, always wear proper safety gear and exercise caution when using power tools.
With a bit of know-how and some practice, you’ll be a pro in no time.
– Step 1: Ensure Safety Precautions
Installing a blade on an angle grinder can be a bit intimidating, but with the right guidance, it is a straightforward process. The first step is always safety precautions. Always wear protective gear such as gloves and goggles to avoid injury from any sharp or flying debris.
Ensure the grinder is unplugged before attempting any blade changes. Once safety is taken care of, it’s time to proceed with the blade change process. The next step is to find the locking mechanism that holds the original blade in place, which can be a knob or a button depending on the model.
Hold down the locking mechanism and simultaneously loosen the blade, being careful not to touch the sharp edges. Carefully remove the blade and replace it with the new blade, ensuring that it is fitted correctly. Lastly, tighten everything back up and plug the device back in for operation, but be sure to test the new blade thoroughly before using it on the job.
By following these simple steps and taking proper precautions, changing blades on an angle grinder will become an easy task.
– Step 2: Remove the Old Disc
Now that you have gathered the necessary tools to install a new blade on your angle grinder, it’s time to begin the second step of the process. Removing the old disc is crucial to ensure a safe and efficient installation of the new blade. To start this step, remove the power source and unplug the angle grinder.
Next, use a wrench to loosen the nut that holds the disc in place. Once the nut is loose, remove it and set it aside. Then, gently remove the old disc from the angle grinder’s spindle, being cautious not to accidentally touch the sharp edges.
Inspect the old disc for any damage or wear before discarding it. Taking your time to remove the old disc properly will help ensure a smooth transition to installing the new blade. Remember not to rush this process as it is vital for you and your grinder’s safety.
– Step 3: Choose the Right Blade
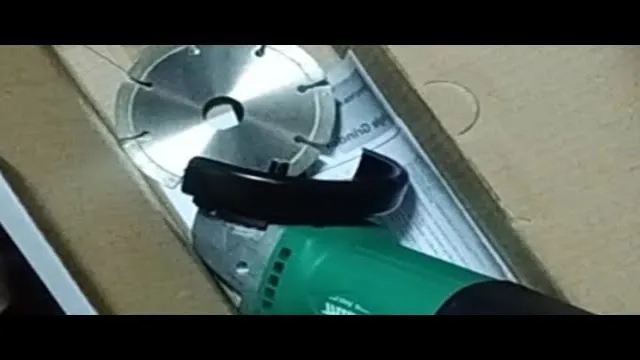
When it comes to using an angle grinder, choosing the right blade is crucial to ensuring a safe and effective operation. While many blades may look the same, it’s important to select one that is specifically designed for the task at hand. For example, a metal cutting blade won’t work well for cutting through concrete or masonry.
Similarly, a masonry blade won’t be effective for cutting through metal. Always check the packaging or manufacturer’s instructions to ensure you have the correct blade for the job. Don’t take shortcuts or try to make do with an old or worn out blade, as this can lead to dangerous and unpredictable results.
By taking the time to choose the right blade, you’ll ensure that your angle grinder works efficiently and safely, and that you achieve the desired results.
– Step 4: Install the Blade
Installing a blade on an angle grinder might seem like a daunting task, but with the right steps, it can be done quickly and easily. The final step in the process is installing the blade itself. Begin by making sure that the grinder is switched off, and then line up the blade with the spindle.
Slide the blade onto the spindle and then lock it in place by tightening the nut with a spanner or locking tool. Make sure that the nut is tightened securely, but be careful not to overtighten it as this could damage the blade or the grinder. Once the blade is securely in place, you’re ready to start using your angle grinder.
Remember to always wear personal protective equipment and to use the grinder safely and responsibly. By following these simple steps, you’ll be able to install blades on your angle grinder like a pro!
– Step 5: Tighten the Blade
Once you have successfully inserted the blade into your angle grinder, it is time to give it a final touch by tightening it properly. This is an essential step toward ensuring that your blade remains secure and in place while you are using your angle grinder. Begin by locating the spindle lock button on your grinder, which is usually located near the top of the tool.
Press and hold the button while using the provided wrench to tighten the nut that holds the blade in place. Turn the nut in a clockwise direction until it is snugly tightened. It is vital to ensure that the nut is not overtightened, as this could cause damage to your tool.
A loose blade, on the other hand, can lead to deadly accidents that you should avoid at all costs. Remember to check your grinder’s user manual for specific instructions on how to tighten the blade. By following these instructions carefully, you can be confident that your angle grinder is ready for use.
– Step 6: Check for Proper Installation
Proper Installation Now that you’ve attached the blade to your angle grinder and tightened the locking nut, it’s time to check for proper installation before use. First, inspect the blade for any damage or warping that may have occurred during installation. Make sure the blade is securely attached to the grinder and doesn’t wobble or shake.
If the blade isn’t properly aligned, it can cause damage to both the blade and the tool, as well as potentially dangerous accidents. Additionally, make sure the direction of the blade’s rotation is correct, as using a blade that’s installed backward can cause the grinder to malfunction or even injure the operator. Finally, double-check that the guard is in place and functioning correctly.
If everything looks good, you can power up your angle grinder and get to work. However, if you notice any issues during this final inspection, it’s important to correct them before turning on the tool for your safety and the longevity of your equipment. Remember, safety should always come first when using power tools!
Conclusion
Congratulations, you are now officially a master of the angle grinder! Just remember, safety is key, so always wear appropriate gear and follow manufacturer instructions carefully. With these simple steps, you can put on a blade like a pro and tackle any project with ease. Now, let’s go cut some metal! #anglegrinderhero
– Recap of the importance of proper blade installation
Proper blade installation is essential for achieving safe and effective cuts on an angle grinder. Here is a step-by-step guide to install a blade on an angle grinder. Begin by unplugging the tool to ensure safety.
Next, remove any bolts or screws securing the protective cover and lift it off. Insert the blade onto the spindle with the direction arrows facing the correct way. Then, hand-tighten the nut onto the spindle and use a wrench to secure it even further.
Make sure the blade is securely tightened before replacing the protective cover and securing it with bolts. Finally, plug in the tool and test the blade’s rotation to ensure everything is working correctly. By following these steps, you’ll ensure that your angle grinder is set up appropriately, providing precise cuts without any safety concerns.
– Final Tips and Warnings
When it comes to installing a blade on an angle grinder, there are a few key steps to ensure a safe and effective process. First and foremost, make sure the grinder is unplugged and the blade is the correct size and type for the grinder. Next, remove the wheel guard and slide the blade onto the spindle, making sure it is secure.
Use the wrench provided to tighten the blade onto the spindle, but be careful not to over-tighten or strip the threads. Once the blade is securely in place, reattach the wheel guard and test the grinder to ensure proper rotation. It’s important to exercise caution when using an angle grinder, as the blades can be very sharp and kick up debris.
Always wear appropriate safety gear, including eye and ear protection, and be sure to follow all instructions carefully. By taking these steps, you’ll be able to effectively install a blade on an angle grinder and use it safely and effectively.
FAQs
What are the steps to put a blade on an angle grinder?
First, make sure the grinder is unplugged. Then, remove the locking nut and washer from the grinder. Slide the new blade on the spindle, making sure it aligns with the markings on the grinder. Reattach the washer and locking nut and tighten with a wrench.
Can any type of blade be used on an angle grinder?
No, only blades designed for use with angle grinders should be used. Using the wrong type of blade can be dangerous and cause damage to the grinder.
How often should the blade be replaced on an angle grinder?
Blades should be inspected regularly for signs of wear and damage. If a blade is worn down or damaged, it should be replaced immediately. How often the blade needs to be replaced will depend on how often the grinder is used and the type of work being done.
Are there any safety precautions to take when putting a blade on an angle grinder?
Yes, always wear protective gear such as gloves, safety glasses, and a dust mask. Make sure the grinder is unplugged before changing the blade, and be careful not to touch the blade or the hot grinder spindle during the process.
How do I know if the blade is properly installed?
The blade should be securely fastened and should not wobble or vibrate when the grinder is turned on. The markings on the blade should align with the markings on the grinder, and the blade should be centered on the spindle.
What should I do if the blade won’t tighten properly on the angle grinder?
Check to make sure the blade is the correct size for the grinder. If it is the correct size, inspect both the blade and grinder for any damage or debris that may be preventing the blade from tightening properly.
Will the type of blade affect the performance of the angle grinder?
Yes, using a blade that is not designed for the type of material being cut can result in poor performance and increased wear on the blade and grinder. Always use the correct blade for the job.


