How to Sharpen a Drill Bit with an Angle Grinder: Expert Tips

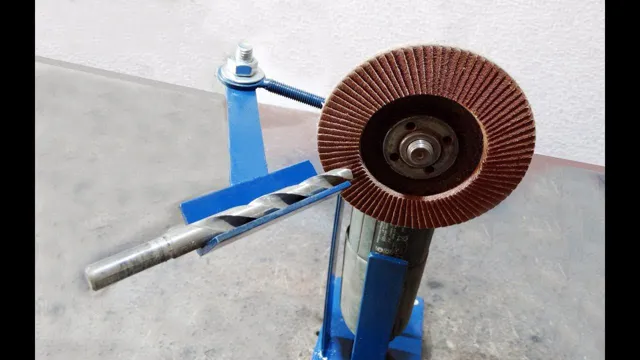
Are you tired of dull drill bits ruining your DIY projects? Sharpening your drill bit with an angle grinder may seem daunting at first, but with a few steps, you can restore your once-dull tool to its former glory. An angle grinder is a versatile tool that can do more than just cut and grind. It can also be used to sharpen a variety of tools, including drill bits.
By using a fine-grit grinding wheel, you can remove the worn-out edges of your drill bit and give it a sharp new point. But why bother sharpening your drill bit in the first place? A dull drill bit can make drilling through tough materials like metal and concrete nearly impossible. Instead of getting frustrated and giving up, try sharpening your bit instead.
Not only will it save you time and money in the long run, but it will also give you the satisfaction of knowing you can handle any DIY project that comes your way. So, grab your angle grinder and get ready to sharpen your drill bit like a pro. With the right technique and a little bit of patience, you’ll be drilling through tough materials with ease in no time.
Introduction
If you’re looking to sharpen your drill bit quickly and effectively, an angle grinder is a great choice. While sharpening with an angle grinder may seem daunting at first, it can actually be quite simple with the right technique. The key is to maintain a consistent angle while grinding the bit to a new point.
It’s important to ensure that the angle is appropriate for the type of bit you are sharpening – consult a guide or reference materials if you’re unsure. Once you’ve selected the right angle, it’s time to start grinding. Position the bit in the grinder so that the cutting edge is facing towards the wheel and use gentle pressure to begin grinding away the dull metal.
Keep a steady hand and be sure to pause periodically to check the progress you’re making. With a bit of patience and practice, you can have a freshly sharpened drill bit ready to drill through anything in no time!
Explanation of angle grinder and drill bit functions
An angle grinder and a drill bit are essential tools for any DIYer or professional craftsman. An angle grinder is a handheld power tool that can be used for a variety of tasks such as cutting, grinding, polishing, and sanding. It is a versatile tool that can handle a wide range of materials such as metal, ceramic, concrete, and wood.
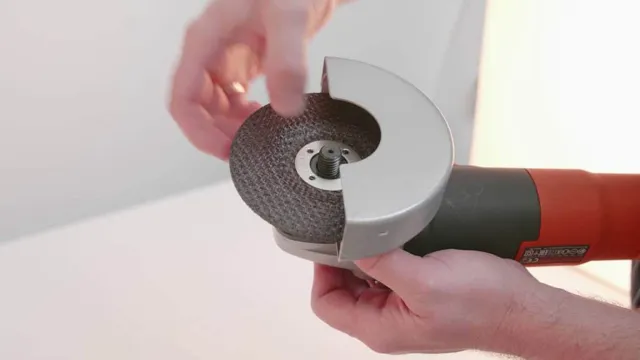
The angle grinder works by spinning a disc or a wheel that is mounted on the shaft. The disc or wheel can be changed depending on the task, allowing for greater flexibility and precision. On the other hand, a drill bit is a cutting tool that is attached to a drill machine.
It is used to create holes in various materials such as wood, metal, and concrete. The drill bit works by rotating and grinding away the material as it moves forward. The diameter and length of the drill bit can range from small to large, depending on the size of the hole needed.
Both tools are essential for any workshop or construction site, and mastering their functions can save time and increase productivity.

Tools and Materials
If you’re looking to sharpen a drill bit quickly and easily, an angle grinder can be your best friend. The process is simple: attach a sharpening wheel to your angle grinder, set the angle of the bit, and gently run it along the wheel. However, it’s important to remember safety precautions, such as wearing protective gear and securing your drill bit firmly before sharpening.
It’s also important to choose the right grinding wheel for the material you’re drilling into, as well as the right angle for the specific bit you’re working with. With a little practice, you’ll be able to keep your drill bits sharp and ready to go for the next project. Overall, using an angle grinder to sharpen a drill bit is an easy and effective solution for anyone in need of fast and efficient tool maintenance.
Angle grinder, drill bit, safety glasses, gloves
If you’re planning on taking on some DIY projects, it’s important to have the right tools and materials on hand to ensure a safe and successful outcome. One essential tool that every DIY enthusiast should have is an angle grinder. This versatile tool is perfect for cutting, grinding, and polishing a variety of materials.
However, it’s important to wear safety glasses and gloves when using an angle grinder as it produces a lot of dust and debris that can cause damage to your eyes and hands. Another must-have tool in your DIY arsenal is a drill bit. Whether you’re drilling holes into wood, metal or concrete, a good quality bit will make the job much easier.
Look for drill bits that are made from high-speed steel or cobalt as they are more durable and will last longer than other materials. Remember, safety should always come first when working with power tools. Be sure to wear safety glasses, gloves, and any other protective gear recommended by the manufacturer.
Always follow the instructions carefully and never use tools that you are not familiar with or are not comfortable using. In summary, an angle grinder and drill bit are essential tools for any DIY enthusiast. Don’t forget to wear safety glasses and gloves to protect yourself while working with power tools.
With the right tools and materials, you can tackle any DIY project with ease and confidence.
Preparing the Work Area
Sharpening a drill bit with an angle grinder might seem daunting at first, but with the right preparation, it can be done with ease. The first and most important step is to ensure that you have a clean and well-lit work area. You don’t want any clutter or distractions that may lead to accidents or mistakes.
Additionally, make sure that you have all the necessary safety gear, such as gloves, goggles, and a mask, to protect yourself from any potential hazards. Once you have set up your work area, it’s time to inspect your angle grinder and drill bit. Check for any damage or wear and tear that may affect the sharpening process.
If everything is in order, then you can move on to the next step, which is selecting the appropriate grinding wheel for your drill bit. Remember to choose the correct size and type of wheel to ensure that you get the best results. With your work area prepped and your tools inspected, you’re now ready to sharpen your drill bit and get back to work in no time.
Setting up a stable work surface
When it comes to any DIY project, having a stable work surface is key. It not only makes the project go smoother, but it also ensures your safety. Before starting any project, take the time to prepare the work area.
Clear out any clutter and debris, and make sure the surface is level. If you’re working outside, consider the weather conditions and find a shaded area to work in to prevent heat exhaustion. At the end of the day, cover your work area with a tarp or plastic to protect it from the elements.
By taking these steps to prepare your work area, you’ll be able to complete your project safely and efficiently.
Sharpening the Drill Bit
Are you tired of buying new drill bits and want to learn how to sharpen them with an angle grinder? This skill is not only cost-effective but also important for maintaining the quality of your work. First, you need to determine the angle of your drill bit and adjust the angle grinder accordingly. Next, place the bit in the grinder and turn it on, holding it at the right angle for a sharp edge.
Be sure to wear safety goggles and take breaks to avoid overheating the metal. Once you have completed the sharpening process, test the drill bit on a scrap piece of wood to ensure it is sharp. With a little practice, you can have a set of sharp drill bits that will last for years.
So why not give it a try and save some money in the process?
Securing the drill bit, choosing the correct angle, grinding the edge
Sharpening the drill bit can seem daunting at first, but with some practice and knowledge, it can become a routine task. One of the most crucial steps in the process is securing the drill bit, which can be done with a clamp or vise grip. Next, it’s essential to choose the correct angle for your bit.
The angle varies based on the type of material you’ll be drilling into, but for most metals, a 118-degree angle is optimal. Once you’ve secured the bit and chosen the angle, it’s time to start grinding the edge. This can be done using a bench grinder or hand-held rotary tool with a grinding attachment.
Keeping the bit cool during the grinding process is crucial to prevent overheating and dulling the edge. Additionally, it’s important to maintain a steady hand and even pressure while grinding to ensure a clean, sharp edge. With a bit of practice, sharpening your drill bits can become a straightforward and essential part of your DIY or professional toolbox.
Safety Precautions
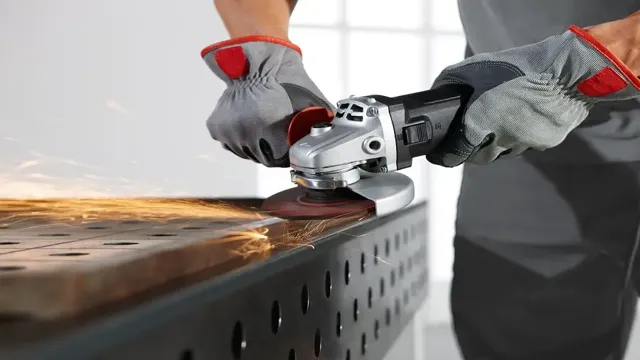
Sharpening a drill bit with an angle grinder can seem like a daunting task, but with the right precautions, it can be done safely and effectively. First, it’s important to wear protective gear, including safety glasses and gloves, to prevent injury from sparks or sharp edges. Secondly, make sure the angle grinder is properly secured and the drill bit is held firmly in place while sharpening.
Additionally, use the correct type of grinding wheel for the type of drill bit being sharpened, which can usually be found in the manufacturer’s instructions. Remember to keep the angle grinder at a consistent speed and angle, and to avoid excessive pressure which could cause damage to the drill bit or angle grinder. By taking these steps, you can safely and effectively sharpen your drill bits, ensuring maximum performance and longevity.
Proper eye and hand protection
Eye and hand protection is an essential safety precaution that everyone should take seriously. Whether you are working in a hazardous environment or participating in recreational activities that pose risks to your body, you need to protect your eyes and hands from potential harm. For example, if you are working in a construction site, you need to wear goggles or safety glasses to protect your eyes from flying debris and dust.
Similarly, if you are handling dangerous chemicals or performing tasks that involve sharp tools, you need to wear gloves to protect your hands from cuts and abrasions. It is vital to choose the right type of eye and hand protection gear for the task at hand, in order to ensure maximum safety. Remember, accidents and injuries can happen in the blink of an eye, so always take necessary precautions to protect yourself and those around you.
Conclusion
In a world where dull tools lead to frustration and sloppy work, sharpening your drill bit with an angle grinder can be a game changer. With a few easy steps and some basic safety precautions, you can transform a worthless piece of metal into a precision cutting machine. So, go forth and conquer your DIY projects with a sharp mind, a steady hand, and a newly sharpened drill bit.
Your projects will thank you.”
Summary of steps, importance of sharp drill bits
When it comes to drilling, sharp drill bits are crucial for achieving accurate and clean cuts. Using dull bits can lead to rough edges, splitting of the wood, or even dangerous accidents. Therefore, it’s essential to keep your drill bits sharp by regularly sharpening them or replacing them with new ones.
Before beginning any drilling task, it’s also important to take necessary safety precautions, including wearing safety goggles and gloves and securing the material you’re drilling. By doing so, you can prevent any potential harm to yourself or others. Don’t let the importance of sharp bits and safety precautions be overshadowed by enthusiasm for a DIY project.
Take the time to ensure that your tools are in optimal condition and that you’re using them in a safe and secure environment. Remember, a little bit of precaution can go a long way in preventing accidents and ensuring the longevity of your tools.
FAQs
What safety precautions should be taken when sharpening a drill bit with an angle grinder?
Safety goggles and gloves should be worn at all times. The angle grinder should be properly secured to prevent slipping and accidentally injuring yourself.
Can any angle grinder be used to sharpen a drill bit?
No, only angle grinders with a specific jig or attachment designed for drill bit sharpening should be used. Using an improper angle grinder can lead to damage to the bit or even injury.
How often should a drill bit be sharpened with an angle grinder?
It depends on the usage and type of material being drilled into. Generally, drill bits should be sharpened at least once or twice a year for regular home use and more frequently for heavy-duty use.
Is it possible to over-sharpen a drill bit with an angle grinder?
Yes, over-sharpening a drill bit can result in reduced performance and increased risk of breakage. It’s important to follow guidelines and pay attention to the angle and amount of material being removed during the sharpening process.
Can multiple drill bits be sharpened with the same angle grinder attachment?
Yes, as long as the bits are similar in size and shape. It’s important to clean the attachment in between uses to ensure consistent and accurate sharpening.
What is the best angle to sharpen a drill bit with an angle grinder?
The optimal angle for a drill bit depends on the bit’s purpose and material being drilled into. Generally, a 118-degree angle is standard for most bits.
Is it necessary to use a coolant or lubricant when sharpening a drill bit with an angle grinder?
It’s recommended to use a coolant or lubricant to maintain the bit’s temperature and prevent overheating, especially when sharpening high-speed steel bits. Water, oil, or commercial coolants can be used for this purpose.


